Pi-based multi-prop trigger for animatronics, Part 1

Next Halloween, my setup will include three coordinated skeletons performing together (probably doing “King Tut“). I want to use a single PIR motion detector to trigger three different props at different offsets from the original trigger. And some of the props can only speak or move for short amounts of time, so for a longer performance, they need to be repeatedly triggered. To do this, I have a PIR providing input to a Raspberry Pi Zero W. A python program running on the Pi then sends brief output trigger voltages individually to each of the props, according to the preset schedule for the routine. This same approach could easily be modified to trigger 2, 4, 5, or more coordinated props from a single start trigger. The hardware setup is very simple, and is shown in the figure.
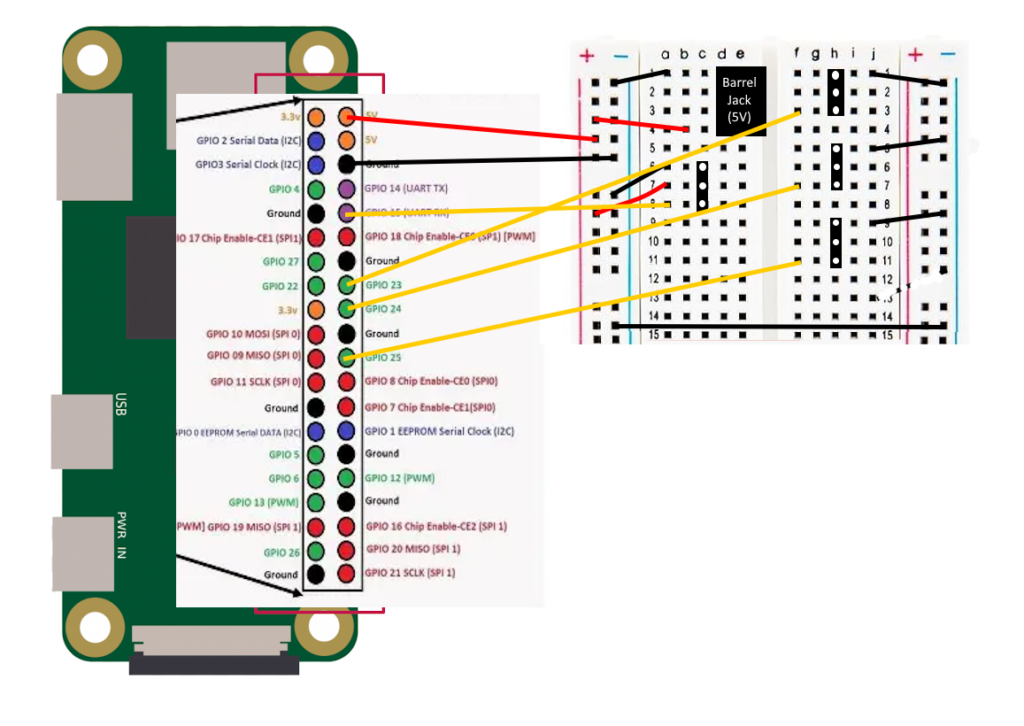
Wiring diagram for the multi-prop trigger. The left is a Raspberry Pi Zero W with the pins enlarged, and the right is a breadboard. The breadboard has a barrel jack for power (that also is wired to the Pi). There are four 3 pin female headers on the breadboard. One is for the PIR sensor, and has all three connections wired. The other three are to send signals to three props. These have the ground and signal wires connected.
Wiring diagram

Power is provided via the barrel jack on the prototype board. This is also what powers the Pi. Their are four 3-pin female headers on the board. The one on the left is for the PIR sensor input. It has the power and ground connections, and the signal wire is an input that goes to GPIO pin 15 on the Pi. The other three headers are to go out to the three props. The grounds are connected so that the prop controls and this trigger share a common ground. The signal connections are outputs from GPIO pins 23, 24, and 25. There is no need for power for these connections. 

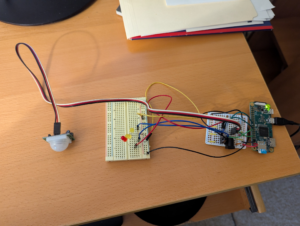
In order to test the hardware, I rigged up one LED to each of the three signal outputs, put a resistor in to avoid burning out any of the LEDs, and linked the grounds. The test setup is shown below below:

Picture showing a Raspberry Pi Zero W on the right, with soldered connections to a soldered breadboard with a 3 pin header that a PIR sensor is plugged into, and three other 3 pin headers that connect to a solderless breadboard with three LEDs connected.

Test setup to make sure the hardware works and that I got the soldering correct.

I used the GPIO Zero library to write a simple test script for this test setup:

from gpiozero import LED
from gpiozero import MotionSensor

myLED1 = LED(23)
myLED2 = LED(24)
myLED3 = LED(25)
pir = MotionSensor(15)

while True:
    if pir.wait_for_motion():
        print("motion detected")
        myLED3.off()
        myLED1.blink(1)
        myLED2.blink(2)
        pir.wait_for_no_motion()
        print("no motion")
        myLED1.off()
        myLED2.off()
        myLED3.blink(3)

This has the pi wait until the PIR detects motion. Then it begins blinking the first 2 LEDs at different rates. When motion stops, those two LEDs are turned off and the third LED begins to blink. This cycle then repeats until the user hits CTRL-C to stop the test script.
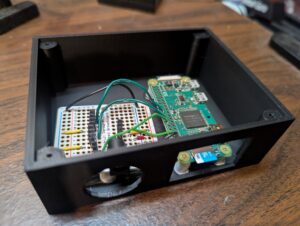
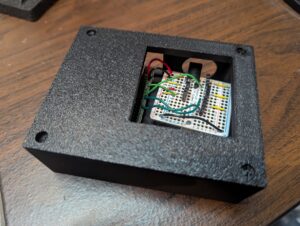
Black project box without the top. It has a large round opening where the barrel jack for power resids, and a large rectangular opening where the micro SC card can be accessed. Inside are the Pi Zero W and the solderable breadboard.

Completed electronics in project box

Completed project box with electronics inside. The cover is on to top. You can see the solderable breadboard with headers through the top cutout.

Completed project box with electronics inside and lid on the top

The circuit is mounted in a custom 3d printed project box with slots for the power, sensor, and output wires, as well as a slot for accessing the Pi’s micro SD card. I designed the box using TinkerCad. I also 3d printed the standoffs, and just used hot glue to glue the Pi and the breadboard in place. I put in large holes so that it would be easy to plug and unplug the connectors and also get my fingers in to insert or remove the micro SD card. The top has a large cutout to make it easy to access the 3-pin headers. The finished hardware is shown in the figures on the right.

Quick Post #4: 3d Printed Monitor Stand

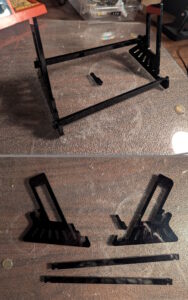
Two combined images showing the original plastic stand, including the broken piece. The top image shows the assembled stand, while the bottom one shows the individual pieces.

Original stand, including broken piece

I have a 7″ touch screen monitor for Raspberry Pi’s. I wasn’t happy with the stand that it originally came with, which was rather flimsy, and the stand broke twice. But I got a 3d printer from my wife for Christmas, and I decided I could build a better stand for it. To design the stand, I used TinkerCad, which while less sophisticated than many other tools, has one of the easiest learning curves.

I started with just a large block in TinkerCad, sized to the dimensions I needed, than cut out sections one by one to form the sloping back, the slot that the monitor slides into to hold it, and a section cut out of the stand so that it would use less plastic.


Side view of the printed monitor stand, clearly showing the slot to hold the monitor. The stand is white.

Side view of the printed stand, showing the slot the monitor slides into.

After I started printing, I realized I could make it even more efficient by making the main section of the stand hollow. To do that, I made a copy of the stand in TinkerCad, cut off the front, then shrank the copy. Then I changed the copy from a solid object to a hole, positioned it inside the original, and joined the hole to the stand.

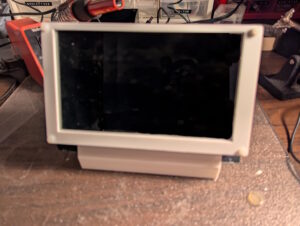
I’m really happy about how it came out, and as you can see in the pictures, the monitor fits perfectly!

I’ve published the model files on Thingiverse.

Picture of the stand with the monitor in place.

The finished stand, with the monitor in place.

Wireless Microphone Using Two Raspberry Pi’s (Updated 5/4/2021)

I’m in the process of integrating wireless audio input and  into my Yorick the Mimic project. This involves adding microphone input and wireless transmission into the sensor cap and then integrating the movement controller with a modified version of Chatter Pi that takes the transmitted audio as an input.

In order to get started, I first put together bare bones transmitter and receive programs. I’m using Python, along with PyAudio, which I also used in Chatter Pi, to process the audio on both ends. I’m using UDP to send the data packets contain the audio. I saw some examples using TCP, but it seemed to me that UDP was better suited to real-time audio. If anyone knows more on which is the better approach, please post a comment.

PyAudio

The code runs fine, but generates a continuing stream of

ALSA lib pcm.c:8424:(snd_pcm_recover) underrun occurred

warning messages. This doesn’t interfere with the program’s operations, but if anyone knows why I’m getting them and/or how to eliminate the warnings, I’d appreciate your letting me know.

PyAudio has two modes, a blocking mode, where each call to pyaudio.Stream.write() or pyaudio.Stream.read() blocks until all the given/requested frames have been played/recorded and a non-blocking mode where a callback function is launched in a separate thread, so that processing can continue in the program calling it, and the thread ends when the current chunk of audio is processed. The gist with my code uses the non-blocking mode using the callback function and two different versions of the receiver, one using blocking mode and one using non-blocking. You need to be careful when using the non-blocking mode that the callback function does not include anything really time consuming, like file reading and writing. If it does, it can’t finish before the next chunk of audio is ready and you get clipping or worse problems.

As is well-known, the audio jack output on a Pi produces low volume, poor quality audio. A USB speaker works much better. However at least for the speaker I’m using, I need to use the ALSAMixer to control the volume. If I touch the speaker icon in the GUI, it produces no sound if set to anything other than the maximum volume. Again, if anyone knows why and how to fix this, please add a comment.

By design, both the xmit and rcv programs run forever once started. There’s one other feature beyond the bare bones basics. The receive program has a Boolean variable named EFFECTS. If set to True, the Sox library is used to deepen the pitch and add a bit of reverb before sending the audio to the speaker.

Hopefully this project will help others with similar needs.