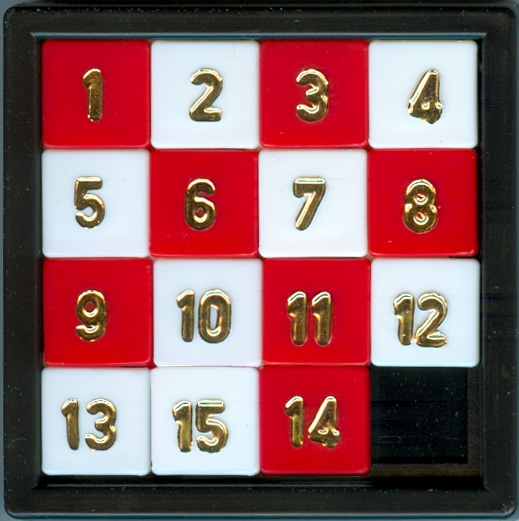
A plastic sliding 15 puzzle using numbers
The sliding puzzle has a long history. The first one, a 4×4, 15 tile puzzle, was made in 1890. A plastic version is shown to the right. The puzzles may have letters forming words or have pictures instead of, or in addition to, numbers. Basically, the tiles are randomized, and then must be returned, by sliding adjacent tiles into the open space one at a time, until the puzzle is returned to the original arrangement.
Many such puzzles have been made, in various sizes. In addition to physical puzzles, video versions can be found on computers and the web.
This is a sliding puzzle game written in #CircuitPython for the @Adafruit #PyBadge and PyBadge LC. It uses pictures for the puzzle, with numbers superimposed to make the puzzles easier to solve. It is configurable so that different images can be used, and it supports both 3×3 (8 tile) and 4×4 (15 tile) puzzles. The tiled graphics approach used in the Adafruit displayio library is ideally suited for a sliding puzzle game.
How it Works
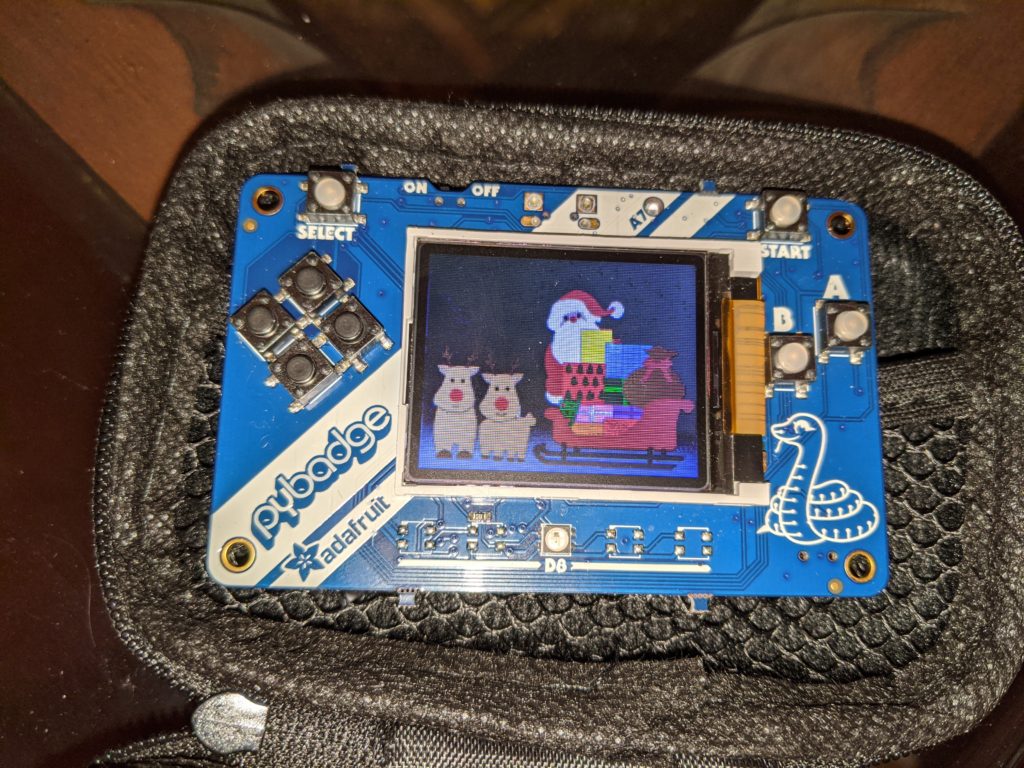
Complete image for Santa puzzle
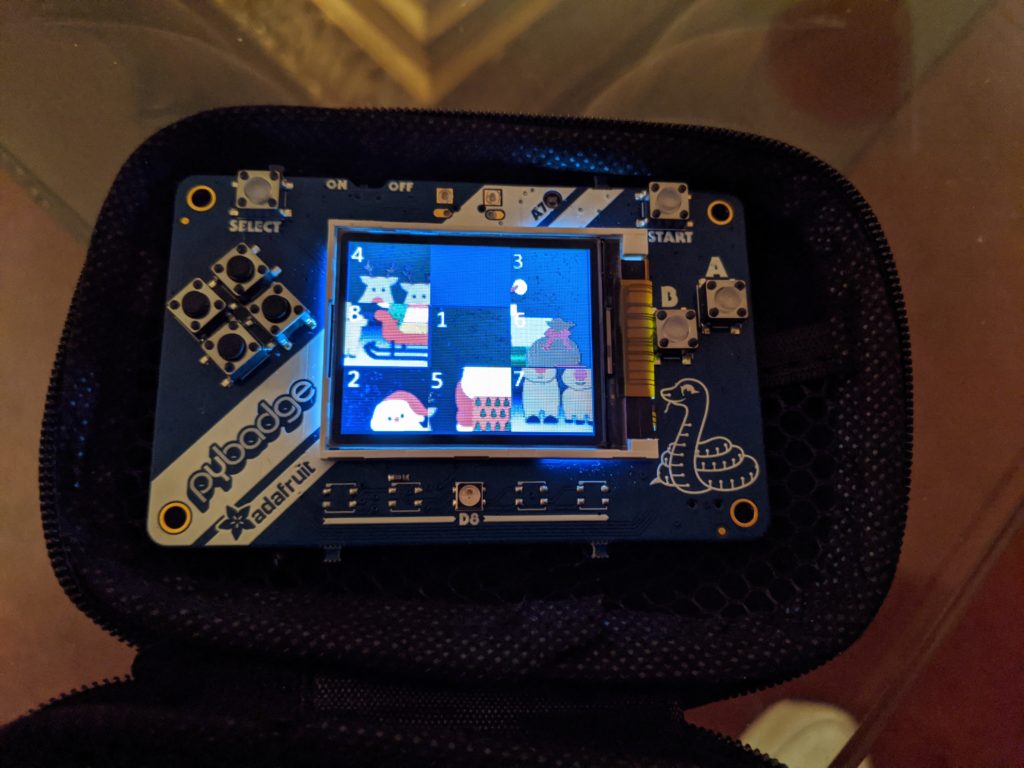
PyBadge showing scrambled puzzle

PyBadge showing solved puzzle
After initial setup and bookkeeping, the program has an infinite while loop. It roughly follows a state machine pattern with the the states being “intro”, “setup”, “play”, and “solved”.
“intro” displays the puzzle image and then asks the player to select either a 3×3 or 4×4 puzzle. Once a selection is made, the state transitions to “setup.” In this state, the puzzle is scrambled and the scrambled puzzle is displayed. Then the state transitions to “play.” In “play”, the program monitors the up, down, left, and right buttons and moves the tiles accordingly. After each move, the puzzle is checked to see if it is in the solved position. If so, the state transitions to “solved”. Once in the “solved” state, the program displays a “You Won” message, then the full image. It then waits indefinitely until the player either presses START to go back to the “intro” state and play again or turns the badge off. The software is open source and published on GitHub.
A Note on Solvability
If one scrambles the puzzle by starting with the solution and then making random allowed moves the puzzle can always be solved. However, with this approach, it takes many, many such movements to really randomize the puzzle. If, instead, one simply places each tile at random, it turns out that only half of the possible arrangements can be slid back to the solution. Borrowing from what others have done, my code chooses a totally random arrangement, then checks if it is solvable (see the “solvable” function in the code). If not, it randomizes the puzzle again, and repeats this process until a solvable arrangement is found and used. The rules for solvability are:
- If the grid width is odd (e.g., 3×3), then the number of inversions in a solvable situation is even.
- If the grid width is even (e.g. 4×4), and the blank is on an even row counting from the bottom (second-last, fourth-last etc), then the number of inversions in a solvable situation is odd.
- If the grid width is even, and the blank is on an odd row counting from the bottom (last, third-last, fifth-last etc) then the number of inversions in a solvable situation is even.
The plastic slider puzzle shown at the top of this post is not solvable. The blank is on an odd row from the bottom (the first), and there is just one inversion, an odd number.
How to Play the Game
To play, simply load the software onto the PyBadge and turn it on. The display will first show the complete puzzle image, and then will ask you to press the “A” button for a 3×3 (8 tile) puzzle or the “B” button for a 4×4 (15 tile) puzzle. One slot is always empty so that tiles can be moved. Once you have made your selection, you’ll see the puzzle image with the pieces, in the solved state, and then the puzzle will be scrambled for play. The 4×4 puzzle is significantly harder than the 3×3 puzzle and will take more moves to solve, but both are fairly easy with practice.
Use the 4 directional buttons to slide a tile at a time. The goal is to get the tiles arranged in numerical order, left to right and top to bottom, with the empty spot on the bottom right. Once you have done this, you win! After the complete image is displayed upon winning, you can press the START button to play again. Sometimes you need to press the button a couple of times.
Stuck? There are a number of heuristics for humans to use to solve these puzzles (as well as heuristic algorithms for computers). The approach that works for me is documented here.
Changing the Puzzle Images and Creating Your Own
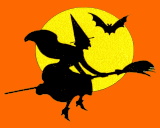
The parameters.py file stores several parameters, including the name of the folder where the puzzle images are stored. To change, for example, from the Santa to the witch puzzle, simply edit the line: puzzle_graphics_folder = “santa” to puzzle_graphics_folder = “witch”. I have provided three sets of images for the puzzle: Santa, a witch, and a Valentine’s Day floral image:


To make your own puzzles, you need to create 3 bmp images:
- The full image, to be saved as “full.bmp” in a new folder
- A tile image for the 3×3 puzzle, to be saves as “tiles3.bmp” in the same folder
- A tile image for the 4×4 puzzle, to be saved as “tiles4.bmp” in the same folder. .
These images must be exactly the right size in order for the program to work. The full image and 4×4 tile image must be 160 pixels wide by 128 pixels high. The 3×3 itile image must be 159 pixels wide by 126 pixels high.
Start from the full image. To make the 4×4 tile image, black out the pixels on the lower right of the image (x coordinates 121 – 160, y coordinates 96 – 128). You can also put numbers on what will be each tile to make solving the puzzle easier To do this, I use an image editing program to add a layer with a set of grid lines creating a 4×4 grid. Then I blacken out the lower right tile and put numbers in the upper right of each tile. Then I delete the grid layer and save the image as a bmp file. Follow the same process for the 3×3 tile image, but first re-scale the total image to be 159 x 126 and use a 3×3 rather than 4×4 grid. Once you have saved the three files in a new folder, change the puzzle_graphics_folder line in the parameters.py program to point to the new folder name.