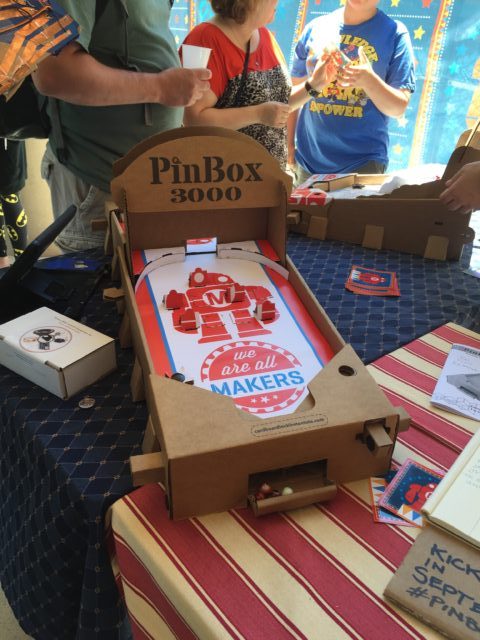
I like to decorate for Halloween, including various talking skeletons that I’ve set up over the years. For Christmas 2015, my wife gave me a great 3 axis talking skull with moving eyes so I could upgrade one of the skeletons from just a moving jaw skull. Then a friend suggested that there had to be other applications for the rest of the year. This got me thinking, and when I saw the Alexa Billy Bass I knew what I had to do, and the Yorick project was born. I’m pretty happy with the result:
Now, if you put this project together from scratch, it’s pretty expensive, due to the cost of the 3-axis talking skull, but if you are looking to re-purpose one you have, or a similar device, then you may want to develop a similar project. The key elements are the talking skull, a Raspberry Pi and the AlexaPi software for turning the Pi into an Alexa client device, the audio servo controller for turning the output sound into servo commands for the jaw, and the servo controller for controlling the nod, turn, tilt, and eye servos of the skull.
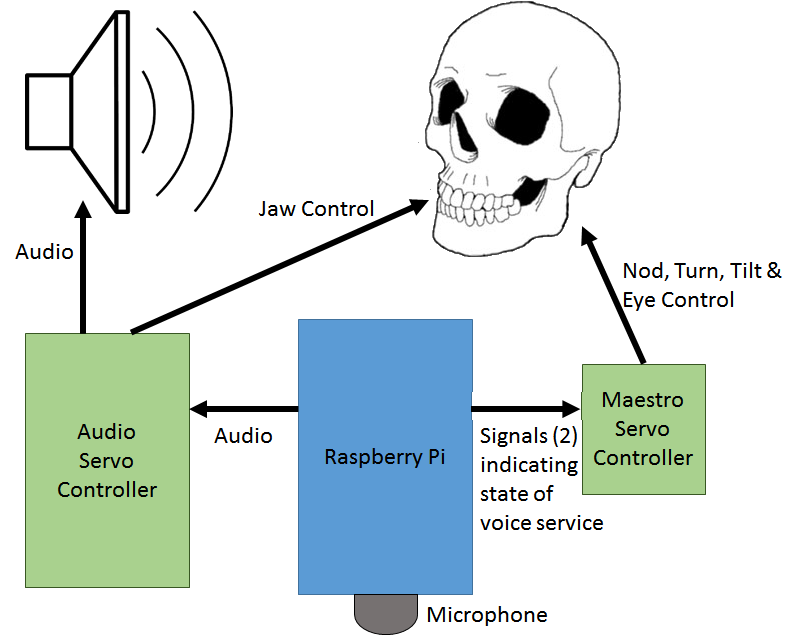
Block diagram for Yorick
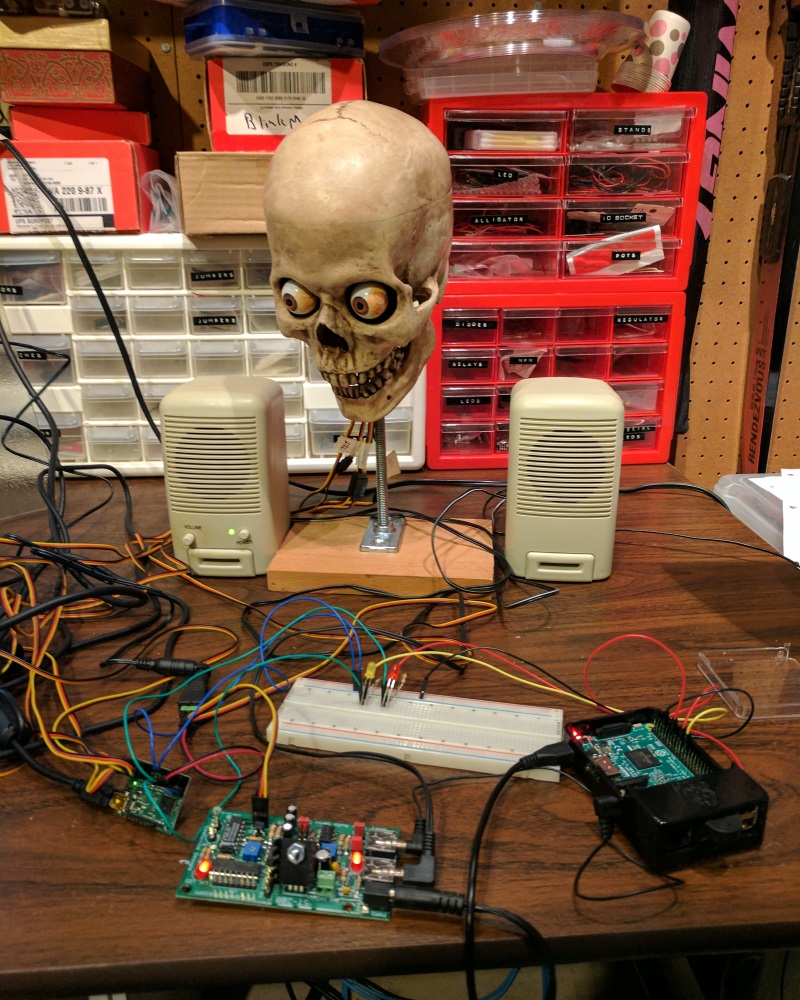
Bench testing the set-up
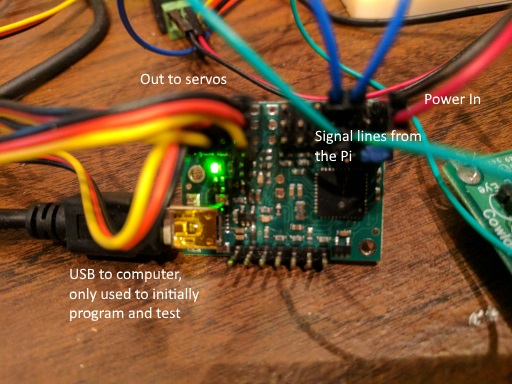
The AlexaPi software provides output to two GPIO pins, intended to light up LEDs as the Pi hears the wakeup word, listens to the input, gets the response from the Amazon Alexa service, and then speaks the response. All the directions for AlexaPi are on the creator’s GitHub site. For this project, we also linked the same pins to input pins on the Maestro servocontroller. The Maestro I used allows pins to be used as output (primarily for servos, but also for other purposes) or as analog inputs. Other models also have digital input pins. By reading the status of the input pins, we know which state to be in, as there is a separate routine of head motions for inactive, wake, listen, get response, and speak response.
The servo sequences are developed using the GUI-based controller software provided by Pololu, and then custom control commands are added using their stack-based scripting language. The partial script is included at the end of the article. The short first section that is provided is the control code I wrote, the rest (not shown) are the automatically generated subroutines based on the sequences I defined using their GUI driven software.
The skull motions for each state are predefined and fixed (the routines are looped as needed for the typically longer lasting states (get response and speak response). The one key tip is to slow down the servos in order to look more realistic. The Maestro controller software lets you limit the speed and acceleration of each servo, and with the exception of the jaw servo, which had to have quick response to changing audio, I set both the speed and acceleration values to 20.
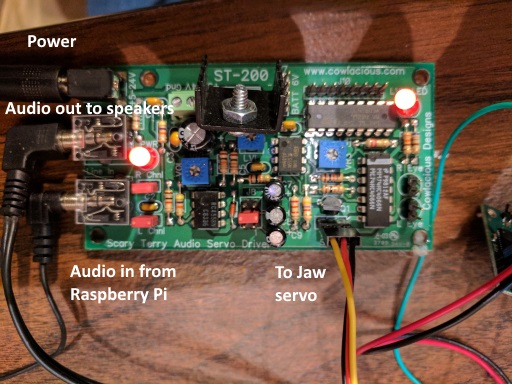
The audio servo driver board converts the audio put out by the Pi into servo commands for the jaw, while also passing the audio through to the powered speakers. Others have developed their own software do drive motor (rather than servo) based devices such as Billy Bass and Teddy Ruxpin, based on the amplitude of the sound. I’m sure the same could be done to drive the jaw servo by extracting the volume of the sound, but I already had an audio servo driver board that is otherwise unused except for Halloween, so I used that. (Update: I’ve since developed my own Raspberry Pi based audio servo controller and there’s also the Jawsduino project that uses an Arduino.)

3-axis talking skull with moving eyes
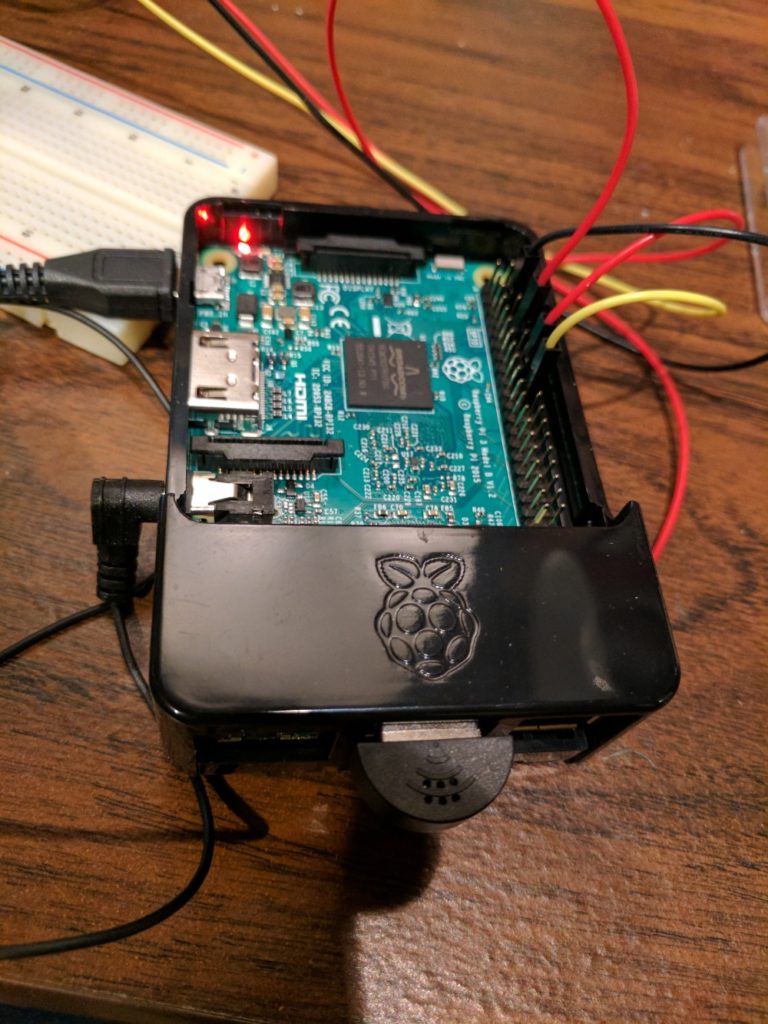
Raspberry Pi with Kinobo USB microphone
Audio servo controller board
Mini Maestro Servo Controller board
I put it all in a project box, and covered the threaded rod supporting the skull with a short length of PVC pipe, painted black, to produce the final result:
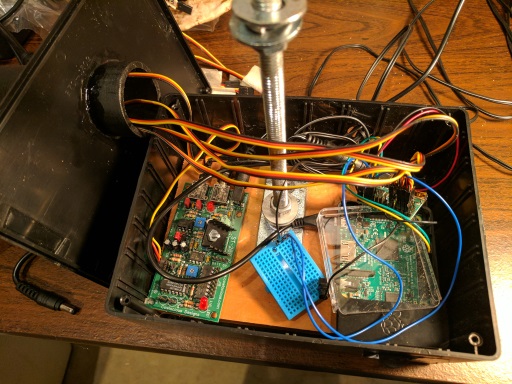
Rather messy (mainly with the 5 servo cables), but it all fits in the box.
Hardware Components
- 3-axis talking skull with moving eyes. Mine is from audioservocontroller.com
- Powered speakers – The Raspberry Pi puts out very little volume from the audio jack, so you want amplified speakers, whether battery powered or from line current. I used an old pair of inexpensive computer speakers
- Raspberry Pi 3 – Other models with WiFi should also work
- Kinobo – USB 2.0 Mini Microphone – You need a microphone for input, and I was quite happy with the performance of this one, considering it only cost $5.25!
- Pololu Mini Maestro Servo Controller – I used the 12 channel version, larger versions should also work.
- Audio servo driver board – I used an ST-200 board from Cowlacious that I had for a Halloween project. That model has been replaced by the newer and improved ST-400 model, which should work fine. audioservocontroller.com also sells a similar board
- Misc., including project box, LEDs (optional), resistors (optional, if LEDs used), breadboard (optional, if LEDs used), PVC pipe, and jumper wires.
Software Components
- AlexaPi open source client software for Amazon’s Alexa service
- Pololu’s Maestro Controller Software – I used the Windows version, but they have versions for Linux as well.
- Custom script for the Maestro servo controller to control the skull. An excerpt to give you a feel for the scripting language is posted below. The full script I used is posted as a gist on Git Hub: https://gist.github.com/ViennaMike/b714fc2c9b7eaaaaff952175536a4942
begin     # Loop until input 9 goes high
  9 get_position # get the value of the red trigger, 0-255
  155 greater_than # test whether it is greater than 155
  if      # Wakeup word detected, run wake movement sequence
    wake
    750 delay
    1 # flag for getting out of loop
    begin
      dup
      while
      9 get_position
      10 get_position
      plus
      300 greater_than
      if     # If after wake, both inputs high, then getting reply
        think
      else
        9 get_position
        155 greater_than
        if     # if just input on 9 high, then speaking reply
          answer
        else
          10 get_position
          155 greater_than
          if   # if just input on 10 high, then listening to query
            listen
          else     # when both inputs at zero, back to rest mode
	    Rest
            1 minus
          endif
        endif
      endif
    repeat
  endif
repeat

### Sequence subroutines: ###
# Sequence subroutines removed not included for brevity